
Quick start — preset to activation
Quick start: preset to activation
Section titled “Quick start: preset to activation”Use this guide when configuring Enrollment Policies for the first time on a new or existing installation.
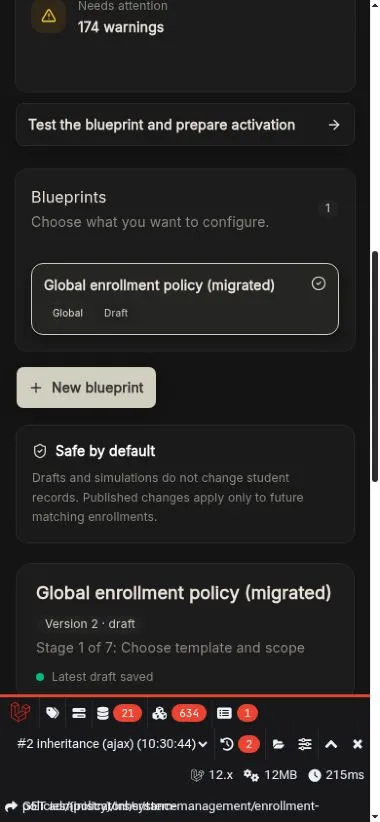
The same guided workspace remains usable on smaller screens without exposing raw configuration.
Before you begin
Section titled “Before you begin”Confirm that you can manage System Management settings and that the school, programs, roles, payment methods, and academic periods already exist. Choose at least one representative student or realistic sample profile for simulation.
Create the global blueprint
Section titled “Create the global blueprint”- Open System Management → Enrollment Blueprint. 2. Select New blueprint. 3. Enter a descriptive name such as
School-wide enrollment foundation. 4. Choose a preset: - Current legacy process is safest when migrating an established school. - Registrar and cashier approval provides a common two-approval starting point. - Manual enrollment keeps assignment decisions with staff. - Automatic curriculum assignment recommends or assigns curriculum subjects. - No-payment enrollment removes the minimum-payment gate. 5. Leave all scope fields blank. The coverage preview should say this is the global blueprint. 6. Select Create guided draft.
Complete the seven stages
Section titled “Complete the seven stages”1. Template and scope
Section titled “1. Template and scope”Confirm the coverage sentence and review inherited layers. A global blueprint has no ancestor. Downloading a backup is optional at this stage.
2. Availability and eligibility
Section titled “2. Availability and eligibility”Start with conservative defaults:
- Allow only enrollment channels the school actively supports.
- Set an opening and closing date if the period is time-limited.
- Keep duplicate-enrollment protection enabled.
- Select allowed schools, programs, student types, periods, and year levels only when restriction is intended.
- Add balance, prerequisite, clearance, capacity, or schedule checks that the school can reliably supply.
3. Required documents
Section titled “3. Required documents”Use student-facing names and instructions. For example: Form 138 with “Upload a clear PDF of every page; the registrar will request the original later.” Mark an item required only if its absence should block progress.
4. Subjects and classes
Section titled “4. Subjects and classes”Choose manual assignment for the safest first rollout. Use automatic curriculum or first-available class assignment only after the curriculum and class capacities are accurate.
5. Tuition and payment
Section titled “5. Tuition and payment”Confirm the course-rate strategy, discounts, additional fees, accepted payment methods, and minimum-payment rule. Use No minimum if payment should not block completion.
6. Approvals and notifications
Section titled “6. Approvals and notifications”Review every workflow card from top to bottom:
- Give each step a plain staff-facing name.
- Select responsible roles.
- Select only the actions that should occur on approval.
- Make exactly one step the final completed outcome.
- Keep the protected Otherwise destination pointing forward.
- Add messages only where students or staff need an update.
7. Test, publish, and activate
Section titled “7. Test, publish, and activate”Save the draft, describe a representative student, and run the journey. Fix every blocker using its Review setting link. Add a change note and publish only when the readiness checklist is complete.
Activate safely
Section titled “Activate safely”After the global policy is published and the compatibility report says Ready to activate:
- Run one final representative simulation against the active global version.
- Select Activate for future enrollments.
- Read the impact dialog carefully.
- Confirm activation.
- Create a test enrollment through each supported entry path and verify the pinned workflow object.